

The 7 steps to formatting your e-book with Microsoft Word!
So you’ve finished writing your manuscript. You’ve received all the feedback you need. You’ve sent it to an editor. The manuscript has received its final proofread.
What’s next?
You need to format your book properly so it can convert into e-reader-friendly files. The two most common are .mobi and .epub. A number of great programs exist to assist you with e-book formatting, from Reedsy to Draft2Digital (and for Mac users, Vellum).
Personally, I prefer to format my e-books using Microsoft Word for two reasons:
I’m comfortable using the program; and
I can quickly make changes to the files if typos or mistakes are spotted after publication.
More importantly, formatting an e-book is incredibly easy in Microsoft Word!
So is your manuscript ready? Let’s go!
Step 1: Clear Meta-Data

Open your manuscript. Before we start formatting, we must ensure your word document has no underlying data capable of clogging the file.
To clear the metadata of your document, click File->Inspect Document. Run the “Inspect Document” function and Remove All data it detects.
For an e-book, you don’t need Headers, Footers, or Page Numbers. Including this extra data in your Word document (and eventual e-book) will only provide an opportunity for something to go wrong with the file.
Step 2: Section Breaks Between Chapters
Many authors most likely create “page breaks” between chapters using “Ctrl + Enter.” However, page breaks aren’t sufficient for proper e-book formatting. You must use a Section Break.
Section Breaks ensure readers swipe right to the next chapter after the end of the previous chapter. The Section Break should also come right after the final word of your chapter, to ensure no white space could also trigger an extra page between chapters. There’s nothing worse than a reader swiping after a chapter ends and discovering a random blank page in the e-book!
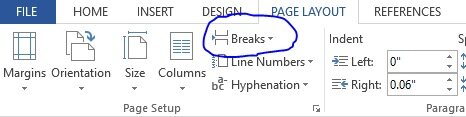
To insert a Section Break: Page Layout -> Breaks-> Section Breaks-> Next Page.
Place a Section Break between each chapter of your manuscript. To ensure no excess page breaks appear, I’d recommend deleting all space between the end of a chapter and the beginning of the next before inserting the Section Break.
Then, ensure your chapter headings are formatted as you wish. At this point, you should also make sure your text is “justified,” rather than right-aligned, and that you’ve turned on auto-hyphenation. Here’s an example from Flight of the 500, my most recent novel:
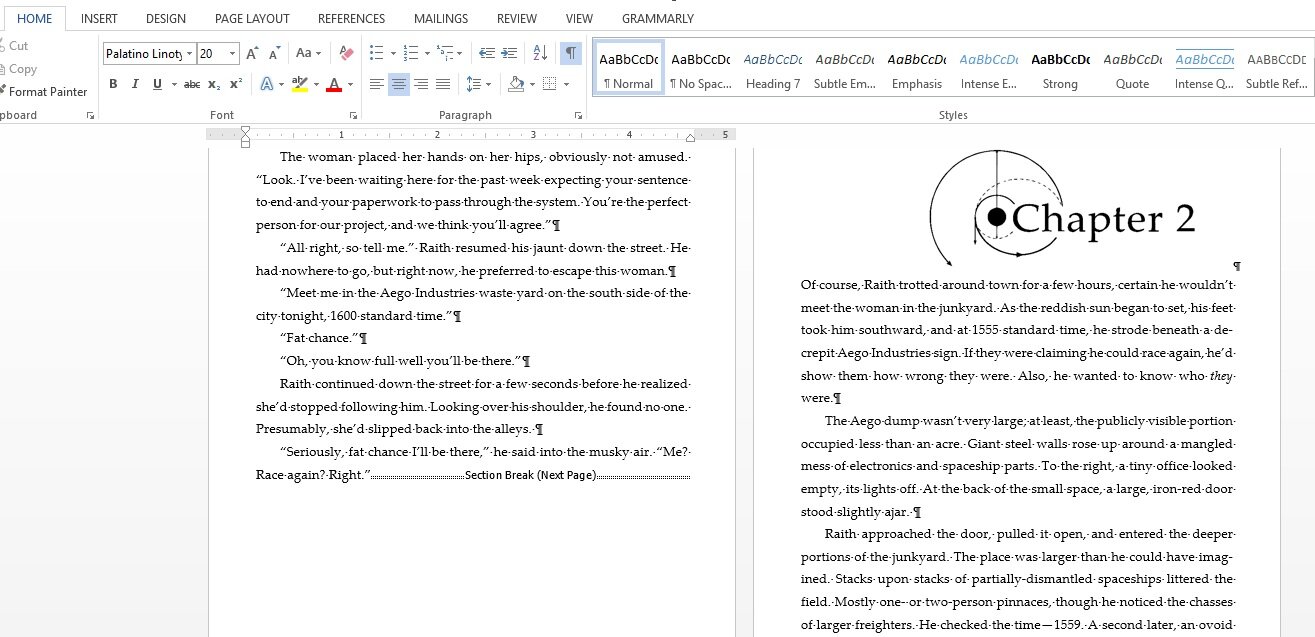
Notice: I’ve turned on the Formatting view on Microsoft Word so I can see all hidden characters. It’s incredibly useful when formatting an e-book in Word, because it shows where all Section Breaks are, paragraphs, tabs, extra spaces, and more!
Step 3: Create Front Matter and Back Matter
After placing proper Section Breaks between every chapter, you need to create your Front and Back Matter. Front Matter should include a Title Page, Copyright Page, and potentially a Table of Contents (more on that later) or an Acknowledgements section. The absolute essential pages are the first two:

I’ve included my contact information and the contact information of my cover artist and editor. I’ve included the basic copyright language, ISBNs, and other credits for graphics used throughout the book.

You could also include Acknowledgements at the beginning. Importantly, you should include a Section Break between each “part” of your Front Matter, and make sure a Section Break rests between your Front Matter and your first chapter!
For Back Matter, I would recommend a brief note encouraging readers to leave a review and a link to additional books or your mailing list. I wrote a short note (featured left) at the end of Flight of the 500.
Like the Front Matter, a Section Break rests between the final chapter and this page, and then another Section Break is at the end of this page, leading readers into the excerpt!
Step 4: Creating Your Table of Contents

The Table of Contents. It’s very simple! Go through each chapter and highlight the Chapter Title, apply Heading 1 Style to each Chapter Title (Home->Style->Heading 1).
I recommend, when applying the style, to first right-click and select “Update Style to Match Selection” so the Heading Style doesn’t override your Chapter Title formatting.
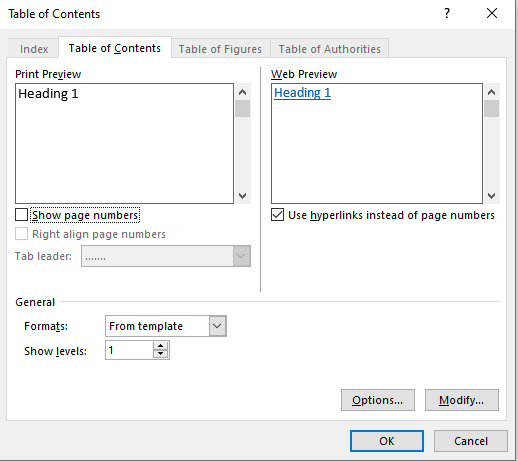
Once you’ve applied “Heading 1” to your Chapter Titles, head to References->Table of Contents->Custom Table of Contents. Deselect “Right Align Page Numbers” and “Page Numbers” and have it only show Level 1, as illustrated.
The Table of Contents will appear wherever your mouse cursor is currently located in the document, so make sure you’ve already built a Table of Contents page in the Front Matter of your book!
Some of you might be asking… is a Table of Contents necessary for an e-book? For a long time, I didn’t think they were necessary, but then I bought a Kindle Paperwhite.
When you create a Table of Contents for your e-book, the Kindle detects the Table of Contents and reads it into the e-reader, giving extra functionality and navigation for readers! Also, Amazon and other retailers highly encourage a Table of Contents for optimal reader experience.
Step 5: Remove Extra Formatting
This next step is the most technical and time-consuming, but it’s one of the reasons I prefer Microsoft Word over other formatting programs.
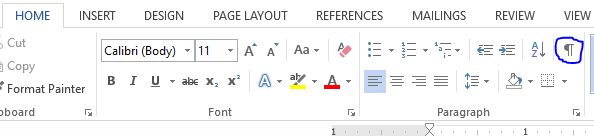
Remember that formatting view I teased earlier? Turn it on again. You need to go through your entire Word document and ensure there aren’t random page breaks, tabs, extra spaces, or other formatting quirks you may have accidentally included when drafting.
Have you ever read an e-book where random line breaks appear where you wouldn’t expect them to be, or a line suddenly only has two words on it with a massive space? These glitches occur because excess formatting errors haven’t been scrubbed from a manuscript. See an example below (I’ve added three errors as examples).
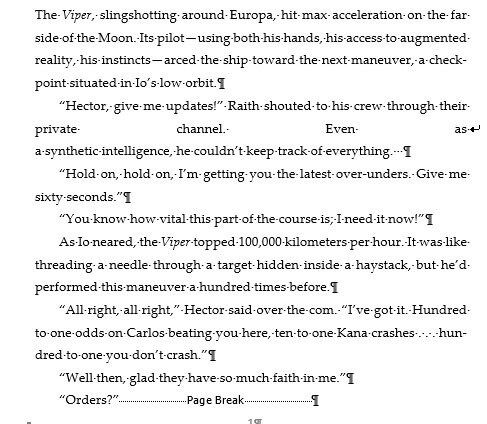
There are three formatting errors above. Can you spot them all?
Step 6: Convert to MOBI and epub!
If you’ve followed all the steps above, you should be ready to convert your Microsoft Word document into an e-pub or a MOBI file! Unfortunately, Microsoft Word can’t do the conversion on its own. You’ll need another program like Calibre to do the trick (Calibre is free, and it’s what I use).
Once you’ve installed Calibre, click “Add Your Book.” Click “Update Metadata” to provide accurate details about the book, then click “Convert Books.”

On this final screen, you can convert your Word document into tons of different file types, but generally speaking, epub and MOBI are all you need.
Note: when converting to a MOBI file, make sure you select “Do Not Add Table of Contents” in the “MOBI Output” Tab. If you leave it selected, it’ll place a redundant Table of Contents at the back of your book. No need for it!

An important note: some e-book distributors, like KDP, can convert Word documents directly into e-books. I prefer to manually convert e-books myself so I can send the file to my Kindle to see how it looks. In addition, I can use those MOBI files to send Advance Reader Copies to dedicated fans.
Step 7: Upload your files!
You’re all set! You’ve got an epub, a MOBI, and they’re formatted properly. I’ve used this method to format all my e-books, and they all come out looking clean and professional, with little to no formatting errors. At least, I’ve not had anyone tell me (yet) that they’ve had issues with the files!
To make clear: there are many different ways to format e-books, and this is my method. I use it because I’m comfortable with Microsoft Word. I like being able to easily edit my Word Document and re-convert it through Calibre in just a few short steps.
Find the method you like, and if you enjoy using Microsoft Word for everything, I hope you’ve found this guide useful!
Did this blog help you? Do you still feel unsure about formatting your e-book? Drop a comment below, or feel free to reach out for formatting assistance! In addition to my services as an editor, I can provide e-book formatting for a reasonable price.